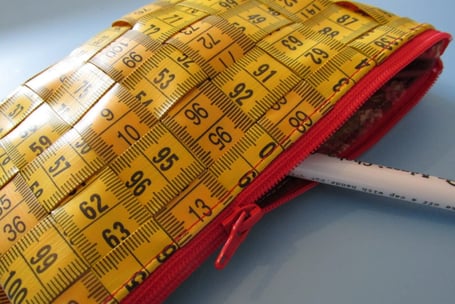
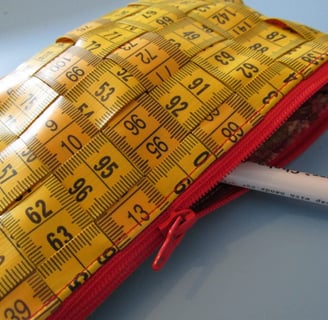
A handy pouch made from measuring tapes.
In this blog, I’ll show you how to create a fun and practical pencil case made from measuring tapes. Let's get started!
5/8/20245 min read
Hope you all had a wonderful summer (vacation)! I had an amazing break and last week I finally got back to work.
To kick off the new school year, I’ve created a fun tutorial on how to make a pencil case... using measuring tapes! It’s perfect for sewing class or as a handy little pouch for your bag.
In this first post, we’ll start by cutting the measuring tapes to size and weaving them into a "fabric." In the next blog, I'll show you how to turn that into a practical pencil case!
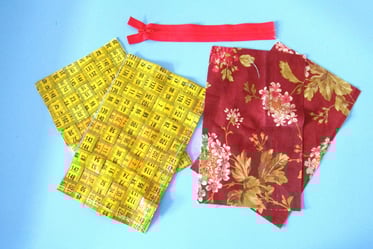
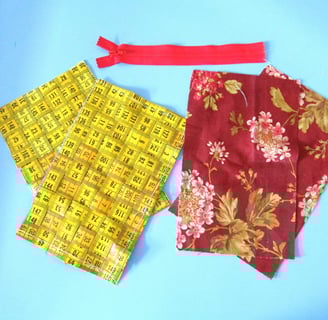
Let’s take a look at the supplies you’ll need:
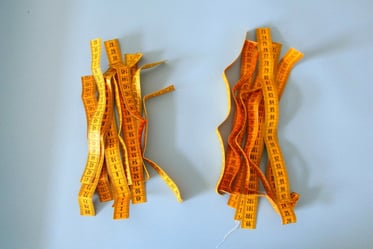
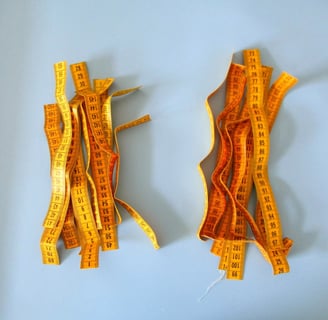
I used 4 measuring tapes.
A 16 cm (6 1/4") zipper.
A piece of fabric for the lining (about 20 x 25 cm / 8" x 10").
I also found that painter's tape is super helpful to hold everything in place while weaving.
Making a Measuring Tape Pencil Case – Part 1
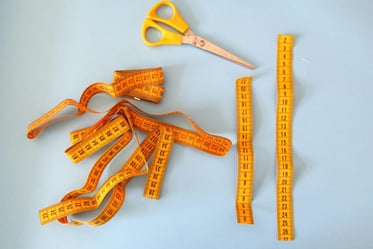
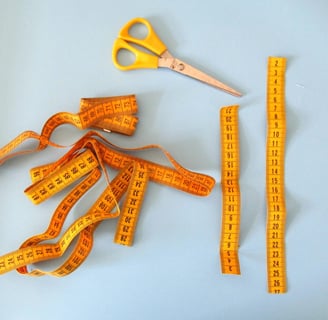
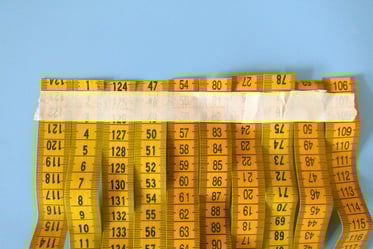
Cut the measuring tapes into 10 long pieces of 26 cm (10 1/4") and 13 shorter pieces of 20 cm (8"). You can snip off the metal ends—if you're using measuring tapes like the ones from Action (Store in the Netherlands), the metal ends come off easily.
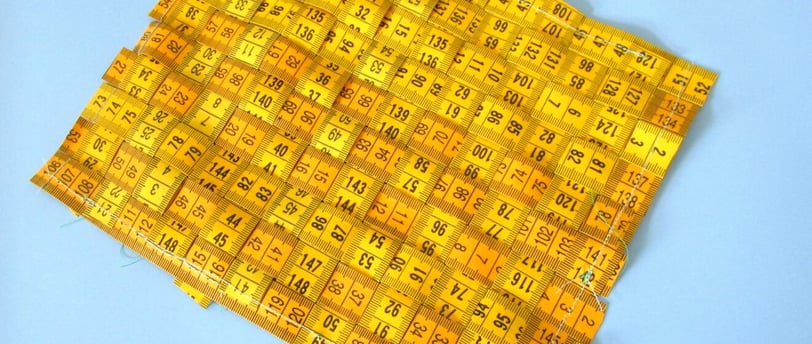
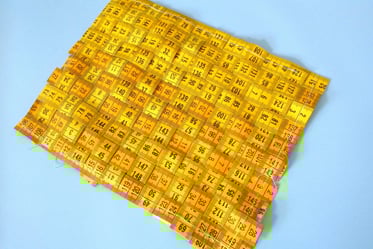
Next, we’ll weave the measuring tapes into a piece of "fabric" that we’ll later use for our pencil case.
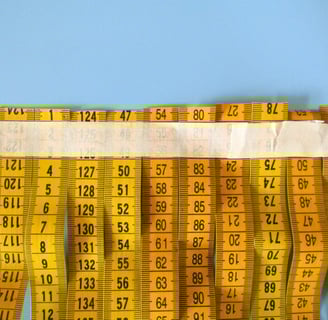
Lay the long pieces side by side, making sure the top edges are aligned. Tip: Use the markings on the tapes to help ensure everything is nice and straight.
Tape the top edges together with painter’s tape or secure them with a few pins. Then, stitch along the top with a large stitch. This will hold the long pieces in place, making it easier to weave the shorter pieces without them shifting.

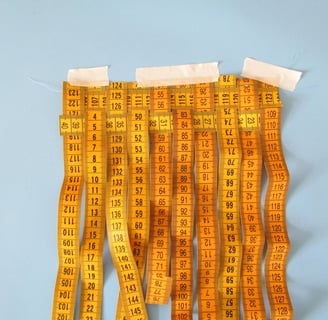
Next, we’ll start weaving the shorter pieces.
The weaving process is really simple: Take a short piece and weave it under the first long strip, over the next, then under again, and so on, until you reach the other side and the entire short piece is woven in. For the next short piece, you’ll do the opposite—start by weaving it over the first strip, then under the next, repeating the process until all the short pieces are woven in.
I taped the top in place, which I found made the weaving easier to manage.
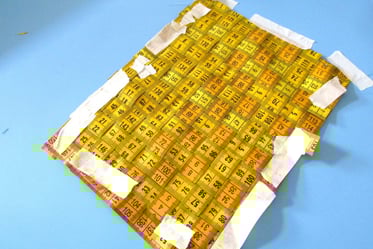
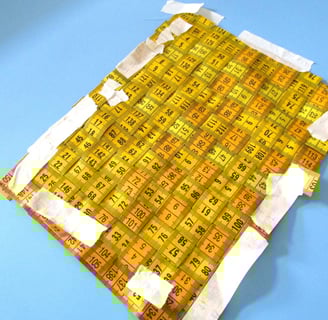

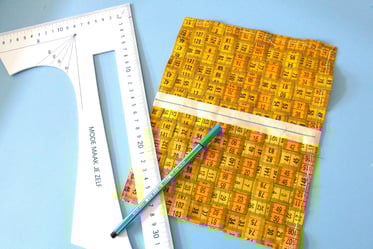
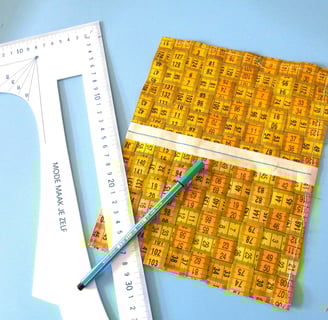
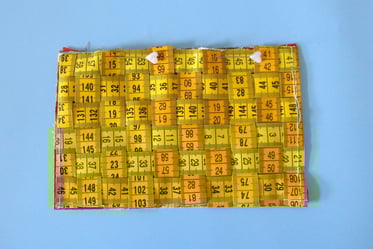
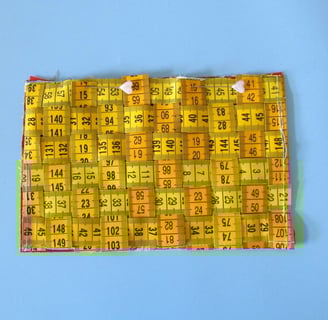
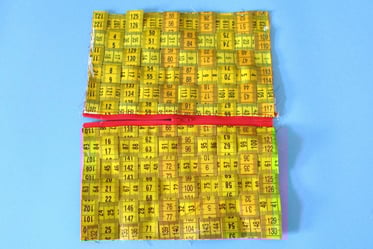
Next, secure the edges with a few pins or use tape to keep the measuring tapes from shifting. Use the lines on the tapes to make sure everything is perfectly straight. Then, sew along the edges with a large stitch to hold the tapes in place. If needed, trim the rectangle to neaten the edges. I find using a cutting mat and ruler helps achieve nice straight lines and sharp corners.
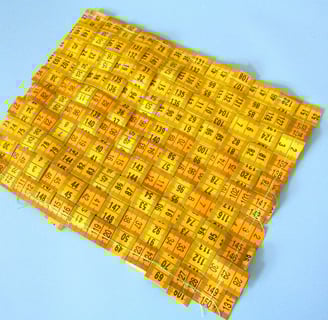
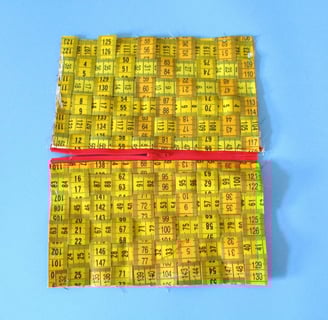
Now, measure the long side of the rectangle, find the center, and place a piece of tape down the middle. Mark the center point on the tape (see the photo below). Sew along both sides of this line, leaving about 3 mm (1/8") of space between the stitching lines, so you have enough room.
We’re about to cut the rectangle into two equal pieces, and this stitching will keep the measuring tapes neatly in place. Once you've made the cut, you'll have two equal sections. Cut two pieces of lining fabric the same size as the measuring tape sections.
Let’s Get Started with the Zipper!
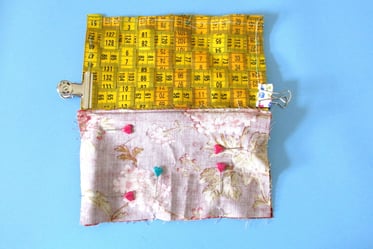
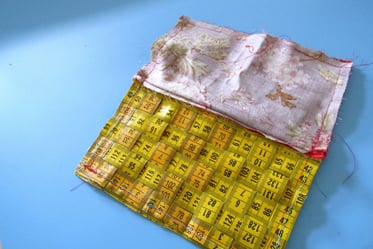
Lay your lining fabric (right side up) flat on your work surface. Then, place the zipper on top—yep, also right side up! Now, grab one of your pieces of “measuring tape” fabric and lay it right over the zipper.
You should now have three layers stacked on top of each other:
The first layer is your lining fabric,
The second is the zipper,
And the third is the woven measuring tape fabric.
Pin these three layers together so they stay in place. To ensure the measuring tapes lay flat, go ahead and topstitch along the edge of the zipper.
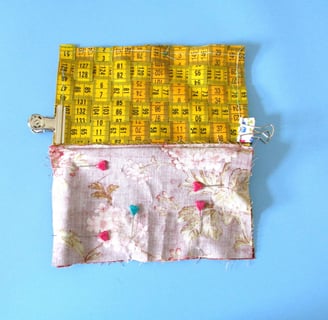
Now, repeat those same steps for the other side of the zipper. And voilà! You’re halfway to your brand new pencil case. 🎉
Time to Bring It All Together!
Next, lay the measuring tape fabric pieces on top of each other, and do the same with the lining fabric. Make sure the zipper points toward the lining—this gives a super neat and polished finish. Pin or clip everything in place. Oh, and don't forget—leave the zipper a little open! Otherwise, you won’t be able to flip your pouch right-side-out later. 😅
Using a zipper foot, sew all three layers together: top fabric, zipper, and lining. Then stitch the top and lining fabrics together but—here’s the trick—leave a small opening in the lining so you can turn the whole thing inside out

The Big Reveal!
Flip your pouch right-side-out through the little opening. The measuring tapes might twist a bit during the process, but no worries—you can easily straighten them out.
Now, for the final step! Fold the seam allowance of the opening inward, pin it, and stitch the opening closed either by hand or with your sewing machine.
And there you have it—your adorable, handmade zipper pouch is ready to use! 🎉💫
Happy sewing!